Failing to calibrate your pre-press workflow causes severe printing defects when executing DTF overførsler. If your DTF transfers ready to press suffer from premature peeling, revner, or visible white borders, the issue tracks back to foundational preparation.
Retail-quality custom DTF transfers for t shirts requires eliminating variables across file design, machine calibration, and thermodynamic pressing.
This technical guide outlines the precise steps required to stabilize your shop’s output and maximize production yields. Following is the brief, one-minute guide, but if you need the detailed one to all your questions, then keep scrolling!
Nøgle takeaways: The 5-Step Rapid Pre-Press Setup
To consistently execute perfect full color DTF transfers, prioritize these baseline operational metrics before starting a production run:
- File Preparation: Export artwork at 300 DPI in CMYK color mode as a transparent PNG or TIFF.
- Choke Settings: Apply a 1–2 pixel “White Underbase Choke” in your RIP software to eliminate external white borders.
- Film Alignment: Verify that the matte, chemically treated side of the PET film is facing the printheads.
- Environment Baseline: Maintain shop humidity between 40% og 60% to suppress static electricity and prevent ink drying.
- Hardware Warm-up: Run the dryer and automated powder shaker unit for 5 minutes to stabilize the heating elements.
Phase 1: Artwork & Digital Preparation
Digital file errors are the leading cause of downstream transfer failures. If a graphic file contains structural defects, the printer will accurately replicate those flaws on the physical garment.
Why Is Low-Resolution Image Upscaling Ineffective for DTF Heat Transfers?
Upscaling low-resolution assets artificially multiplies pixels without generating true detail. This forces the printhead to map blurry, pixelated edges, which compromises the sharpness of DTF heat transfers.
- The Resolution Metric: All raster graphics must be rendered at a native 300 Dpi (prikker pr. tomme) at the final print size.
- The Upscaling Problem: Forcing a 72 DPI web image up to 300 DPI via software interpolation creates soft, anti-aliased borders.
- The Artifact Trap: These semi-transparent pixels confuse the RIP engine, leading to inconsistent ink layout and jagged transfer borders.

How to Identify the “Transparency Trap” and Stray Pixels?
The transparency trap occurs when semi-transparent pixels or invisible background fragments remain in a graphic file. The RIP software reads these fragments as active print zones, laying down white ink that catches hot-melt powder and creates an unappealing white “støvning” on the garment.
- Isolate the Transparent Layer: Open the artwork in your design suite and disable all background layers to view only the alpha channel.
- Apply a High-Contrast Threshold Mask: Add a temporary, solid black background beneath the design, then apply an extreme levels or threshold adjustment to expose semi-transparent pixel halos.
- Execute Vector Mask Trimming: Use a hard vector mask to trim away all anti-aliased edges and stray artifacts, ensuring every perimeter pixel is 100% opaque.
Vector vs. Raster: What Controls Edge Definition?
For geometric shapes, typografi, and crisp logos, vector formats (SVG, PDF, EPS) are superior to raster formats (Png, Tiff).
Vectors calculate lines using mathematical paths rather than a fixed grid of pixels. This allows the artwork to scale infinitely without losing edge sharpness, ensuring clean borders and flawless ink boundary isolation.
Phase 2: RIP Software Calibration
De Raster billedprocessor (RIVE) serves as the translator between your digital file and the physical printheads. Proper calibration here controls ink density, farvejustering, and white ink accuracy.
How Do You Optimize White Underbase Alignment and Density?
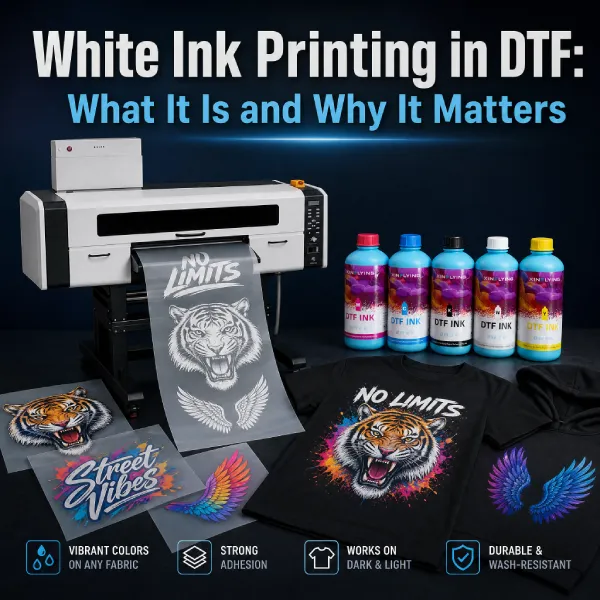
White underbase optimization requires balancing the white ink layer density against the base garment color. Dark fabrics require higher white opacity to block the fabric color, while light garments allow for lower ink deposition.
- White Ink Density Regulation: Set your RIP white ink layer between 60% og 80% for standard dark apparel. Over-saturating the film with excess white ink causes pooling, which leads to pinholes during the heat-curing phase.
- The Choke Setting Protocol: Always configure a 1-to-2-pixel choke. This instructs the RIP engine to shrink the white underbase slightly inward, ensuring the colored CMYK layer completely masks the white ink during the physical expansion of the press cycle.
Custom ICC Profiles for Full Color DTF Transfers?
Digital printing inks shift dynamically based on temperature, fugtighed, og film types. To ensure that the colors rendered on your monitor accurately match the final transfer on the shirt, you must use optimized International Color Consortium (ICC) profiles.
Xin Flying provides custom, pre-calibrated ICC profiles developed specifically for our ink formulations and hardware configurations, minimizing color shifts and eliminating wasted film.

Pro-Tip: The Mirroring Reminder
Unlike Direct-to-Garment (DTG) systems that print face-up directly onto fabrics, DTF is an indirect transfer method. You must mirror your artwork horizontally (X-axis) inside the RIP software prior to printing. If you fail to mirror the file, the design will face backward once heat-pressed onto the garment.
Phase 3: Hardware & Miljøkontrol
Industrial printheads are precision instruments that respond rapidly to changes in ambient temperature and humidity. Controlling your production environment is critical to minimizing machine down-time.
How Does Humidity Impact Commercial DTF Printers?
High humidity causes film ink-pooling, while low humidity (below 40%) creates static electricity that distorts ink deflection. Maintaining a stable environment protects the printheads from drying out or clogging.
| Environmental Metric | Optimal Range | Operational Impact of Out-of-Range Metrics |
| Relative Humidity | 40% – 60% | Under 40% causes head drying and static; above 60% induces ink running on PET film. |
| Ambient Temperature | 68°F – 78°F (20°C – 25°C) | Cold temperatures alter ink viscosity; excessive heat causes rapid solvent evaporation. |
To mitigate these environmental risks, industrial printers utilize advanced engineering safeguards.
For eksempel, Xin Flying machines feature integrated, automatic moisturizing capping systems. This mechanism seals and hydrates the printhead nozzles when idle, preventing localized ink drying and keeping the nozzles clear without requiring constant manual intervention.

Step-by-Step Nozzle Check Protocol
Never initiate a production run without verifying nozzle integrity. A single missing nozzle line can introduce fine banding lines across large print gradients.
- Execute a Test Pattern Print: Load a scrap piece of PET film and select “Nozzle Check” from the machine control panel.
- Analyze the Grid Pattern: Inspect the printed test grid under bright light. Look for any broken lines or missing color blocks across the CMYK and White channels.
- Perform Targeted Head Cleaning: If gaps are detected, execute a standard head cleaning cycle. Do not proceed to production until the nozzle check pattern is 100% complete and gap-free.
How to Reduce Static in Powder Film?
In dry climates, PET film builds a static charge as it unrolls. This charge acts like a magnet, causing hot-melt adhesive powder to cling to non-printed, transparent areas of the film.
To combat this, ensure your printer is properly grounded via a dedicated earth line, use anti-static tinsel across the film feed path, and operate an industrial humidifier to keep ambient moisture within the optimal 40–60% window.
Phase 4: Powdering & Hærdning
The application and thermal processing of the thermoplastic polyurethane (TPU) powder determines the ultimate wash-fastness, fleksibilitet, and longevity of the transfer.
How to Match the “Orange Peel” Adhesive Texture?
Properly cured TPU powder must melt into a smooth, uniform, slightly textured glaze that resembles the skin of an orange. If the texture looks like dry powder, it is under-cured; if it is completely flat, glass-like, or bubbling, it is over-cured.
[Under-Cured: Chalky/Dry] ──> [Perfectly Cured: Glossy Orange Peel] ──> [Over-Cured: Flat/Boiled]
- Under-Curing Risks: If the powder is under-cured, the adhesive polymer will fail to cross-link with the shirt fibers, causing the graphic to peel away during the first wash cycle.
- Over-Curing Risks: Over-curing burns away the active bonding elements of the TPU powder, rendering the transfer brittle and prone to immediate cracking under tension.
How to Calibrate Shaker Speed to Eliminate Ghosting?
The automated powder shaker must be precisely tuned to remove excess adhesive without disturbing the wet ink design.
If the shaker speed is set too low, stray powder remains on the film, creating a hazy “Ghosting” effect around the printed graphic. Conversely, if the agitation is too aggressive, it can physically displace the wet ink layers, blurring fine lines and sharp details.
How to Avoid Warping — Multi-Zone Temperature Consistency
As PET film passes through a curing dryer, uneven heat distribution causes the film edges to warp and curl inward. Industrial curing systems utilize multi-zone heating profiles to resolve this issue.
By applying independent, graduated heat controls across the entry, middle, and exit zones of the dryer, the film maintains structural stability, ensuring a perfectly flat transfer sheet that feeds smoothly onto the take-up reel.
Phase 5: The Final Heat Press
The final phase transfers the cured polymer from the PET carrier sheet onto the target garment fibers using controlled thermodynamics.

[Trin 1: Moisture Purge (5s)] ──> [Trin 2: Primary Transfer Press (10-15s)] ──> [Trin 3: Peeling] ──> [Trin 4: Finish Press (5s)]
The Garment Moisture Purge
Natural fabrics like cotton absorb substantial ambient moisture. Before positioning your transfer, clamp the blank garment in the heat press for 5 seconds at production temperature.
This removes trapped moisture and wrinkles. Skipping this step allows trapped moisture to instantly flash into steam during the transfer cycle, pushing up against the melting TPU powder and disrupting chemical adhesion.
Cold Peel vs. Hot Peel Mechanics
Your peeling technique must match your film’s chemical coating specification:
- Hot Peel Films: Designed with an instant-release coating. Peel the PET liner smoothly in a single, fluid motion within 2 til 3 seconds after the press opens. This is ideal for maximizing throughput in high-volume production environments.
- Cold Peel Films: Engineered with a temperature-locked release agent. You must remove the garment from the press platen and allow it to cool completely to room temperature before removing the film. Peeling a cold-peel film while it is still warm will pull the ink off the fabric fibers, ruining the graphic. This film type is highly recommended for high-stretch fabrics like polyester sportswear, as it provides a more stable initial bond.

The Secondary Finishing Press
After removing the PET liner, place the garment back onto the heat press, cover the design with a Teflon sheet or high-grade parchment paper, and execute a final 5-second finish press.
This secondary press drives any raised ink edges deep into the fabric weave, flattening the print matrix and increasing wash durability.
DTF Transfers Troubleshooting
| Observed Problem | Probable Root Cause | Corrective Action Protocol |
| Transfer peels off during the first wash cycle. | The TPU adhesive powder was under-cured in the dryer. | Increase the curing dryer temperature by 10°F or slow down the belt speed to extend heat exposure. |
| The print develops fine cracks when the garment stretches. | Insufficient pressure or heat during the primary press cycle. | Verify platen temperature with an infrared thermometer; increase pressure setting to medium-firm (45–60 PSI). |
| White ink shadows peek out around the edges of colored print areas. | Incorrect registration alignment or missing choke configurations in the RIP software. | Open RIP settings and apply a minimum 1.5-pixel “White Underbase Choke” to contract the white foundation layer. |
| Adhesive powder sticks to unprinted, transparent areas of the film. | High static electricity caused by low shop humidity. | Increase room humidity to 40-60% using a humidifier, and verify the printer’s ground wire connection. |
Wanna Achieve Stable Printing Production?
Developing a disciplined pre-press routine minimizes material waste and ensures repeatable quality for every garment you produce. By managing your files, miljø, and heat variables, you protect your margins and build long-term customer trust.
Ready to optimize your production efficiency? Contact Xin Flying for more practical DTF solutions.
Reference
- DF DALLAS: CMYK + W: Understanding the White Ink Layer and Its Importance in DTF Transfers