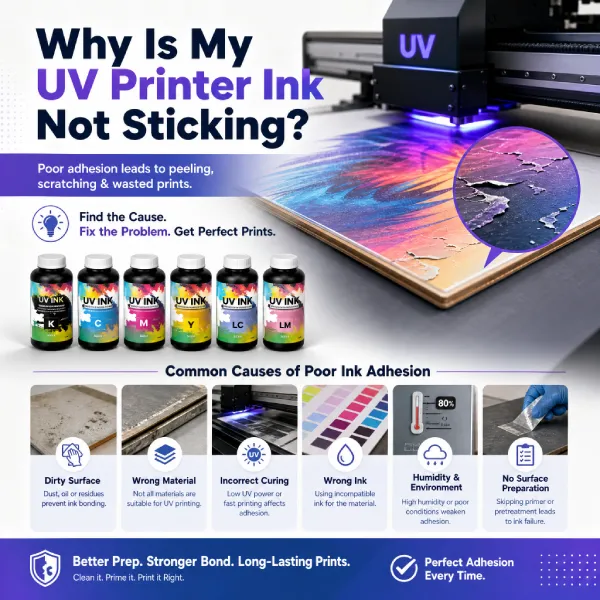
UV printer ink not sticking to the substrate is one of the most frustrating problems you can run into, especially when you are in the middle of a production run. The good news is that adhesion failure almost always has a fixable cause, and in most cases you can trace it back to one of a small handful of issues: surface preparation, curing settings, توافق الحبر, or environmental conditions. This guide walks through each one in detail so you can diagnose exactly what is going wrong and fix it without wasting more material.
It is worth understanding briefly why حبر للأشعة فوق البنفسجية adheres at all, so that the troubleshooting steps make sense. UV printing works by printing UV-curable ink directly onto a substrate, then instantly curing that ink with ultraviolet light. The UV lamps cause a chemical reaction called polymerization, which hardens the ink and bonds it to the surface. If any part of this process is disrupted — the surface is contaminated, the cure is incomplete, or the ink is not compatible with the material — the ink will not bond properly and will either peel, scratch off, or fail entirely.
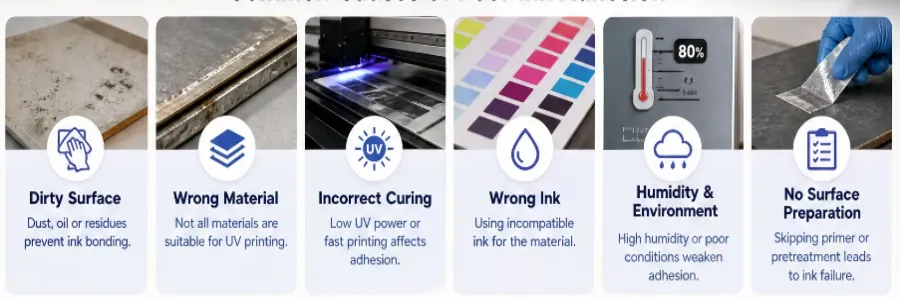
The Most Common Causes of UV Ink Not Sticking
- Surface contamination — oils, تراب, رُطُوبَة, or release agents on the material
- Insufficient UV curing — lamps too weak, speed too fast, or lamp age reducing output
- Missing or incorrect primer/coating — especially on glass, معدن, and some plastics
- Wrong ink formulation for the substrate material
- Environmental factors — temperature or humidity outside of optimal range
- Incorrect print head height — too far from the surface reduces cure effectiveness
Each of these causes a different pattern of adhesion failure, and knowing what to look for helps narrow down the problem quickly.
مشكلة 1: Surface Contamination
Surface contamination is the single most common reason UV printer ink does not stick, and it is easy to overlook because the surface often looks clean to the naked eye. Oils from handling the material with bare hands, dust particles, moisture from humidity, or residues from manufacturing coatings all prevent UV ink from making direct contact with the substrate. Since UV ink bonds through direct adhesion and chemical polymerization rather than soaking into the material, even a thin invisible film of contamination is enough to cause the ink to peel off cleanly after curing.
How to fix it:
- Always wear clean nitrile gloves when handling substrates before printing — fingerprints are a very common cause
- Wipe the surface with isopropyl alcohol (IPA) في 70% or higher immediately before printing
- For wood, also check whether the surface has a factory sealant or wax coating that needs to be sanded or stripped first
- For acrylic, use a dedicated acrylic cleaner rather than IPA, which can sometimes leave residue on certain acrylic formulations
- For metal, check for any anti-rust or anti-corrosion coatings applied during manufacturing — these almost always need to be removed before printing
A good test: wipe the surface with a clean white cloth after cleaning. If the cloth picks up any color or residue, the surface is not clean enough for printing. Clean again and repeat until the cloth stays completely clean.
مشكلة 2: Insufficient UV Curing
If the ink cures but peels off or scratches away easily, the most likely cause is incomplete curing. UV lamps degrade over time and lose output intensity, which means a printer that was producing perfectly cured prints six months ago may now be under-curing with the same settings. According to Nazdar’s technical resources on UV inkjet printing, UV lamp output can drop significantly over time even when the lamps still appear to be working, which is why lamp hour tracking and periodic intensity testing matter for consistent adhesion results.
How to fix it:
- Check your UV lamp hours against the manufacturer’s recommended replacement interval — most UV lamps need replacement every 500 ل 1,000 hours of use
- Reduce print speed to increase the time the substrate spends under the UV lamps
- Check lamp intensity with a UV radiometer if available — this gives a direct measurement of actual lamp output rather than relying on hours alone
- Make sure the lamp housing is clean — dust and ink mist on the lamp surface reduce UV output
- Check that the lamp cooling system is working correctly — overheating lamps reduce output and lifespan
A quick field test for under-curing: try to scratch the cured print with your fingernail on a test piece. Properly cured UV ink should not scratch off. If it does, slow down the print speed or check your lamps before continuing the production run.
مشكلة 3: Missing or Incorrect Primer
Some substrates simply do not provide a surface that UV ink can bond to without help. Glass is the most common example — UV ink will not adhere reliably to unprimed glass regardless of how clean the surface is. Certain metals, especially aluminum with a smooth mill finish, and some hard plastics also benefit significantly from a primer or adhesion promoter. As noted in Mimaki’s UV printing substrate guide, applying the correct primer for the specific substrate type is one of the most reliable ways to solve adhesion problems on difficult materials.
Substrates that commonly need primer:
- Glass — always use a UV-compatible glass primer before printing
- Polished or anodized aluminum — adhesion promoter recommended
- ABS and polycarbonate plastics — some formulations need primer, others do not
- Powder-coated metal — surface texture varies and primer helps consistency
How to fix it:
- Apply a thin, even coat of UV adhesion promoter or substrate-specific primer
- Allow the primer to dry completely before printing — wet primer causes adhesion failure just as contamination does
- Use a primer specifically matched to your ink formulation — primers from different manufacturers are not always compatible
- Test on a small sample before committing to a full production run with a new primer product
مشكلة 4: Ink and Substrate Compatibility
Not all UV inks bond equally well to all substrates. Rigid UV inks are formulated for hard surfaces like acrylic and metal, while flexible UV inks are designed for materials that flex, like thin plastics and certain laminates. Using a rigid ink formulation on a flexible substrate will cause the ink to crack and peel as the material flexes. بصورة مماثلة, using an ink formulated for one plastic type on a chemically different plastic can result in poor adhesion even with perfect surface preparation. Nazdar’s inkjet ink compatibility documentation outlines how different resin systems within UV inks affect adhesion across substrate categories.
How to fix it:
- Confirm your ink type matches your substrate — check with your ink supplier if you are unsure
- For flexible substrates, use a flexible UV ink or a UV ink with a high flex additive
- Run a full adhesion test (cross-hatch tape test) on any new substrate before production
- When switching to a new material type, always validate ink compatibility before assuming it will behave the same as similar-looking materials
مشكلة 5: Environmental Conditions
Temperature and humidity in the print environment affect UV ink adhesion more than most operators expect. Cold substrates cause UV ink to pull away from the surface before curing is complete, since the viscosity of the ink changes at lower temperatures. High humidity introduces moisture between the ink and the substrate, which interferes with adhesion the same way contamination does.
Recommended environmental conditions for UV printing:
- درجة حرارة: 18 ل 25 degrees Celsius (65 ل 77 درجة فهرنهايت)
- رطوبة: 40 ل 60 percent relative humidity
- Substrates stored in a cold environment should be brought to room temperature and allowed to acclimate for at least 30 minutes before printing
- Avoid printing in environments with air conditioning or heating blowing directly onto the substrate, which can cause uneven temperature across the surface
مشكلة 6: Incorrect Print Head Height
The distance between the print head and the substrate surface affects both ink droplet placement accuracy and the effective UV cure intensity. If the print head is set too high, the ink droplets travel further before landing, spreading more than intended and landing with less precision. More importantly, the UV lamps are optimized for curing at a specific focal distance — moving further from that distance reduces the intensity of UV energy reaching the ink surface, which can lead to under-curing even when the lamp itself is in good condition.
How to fix it:
- Check the manufacturer’s recommended print head height for the specific substrate thickness you are using
- Use the printer’s media thickness measurement feature if available, rather than estimating by eye
- For uneven or warped substrates like natural wood, check flatness before printing — even a slight warp can create areas that are too far from the print head
- Never set the print head height to the minimum clearance just to maximize cure intensity — physical contact between the head and substrate will damage both
UV Ink Adhesion by Substrate: خشب, أكريليك, and Metal
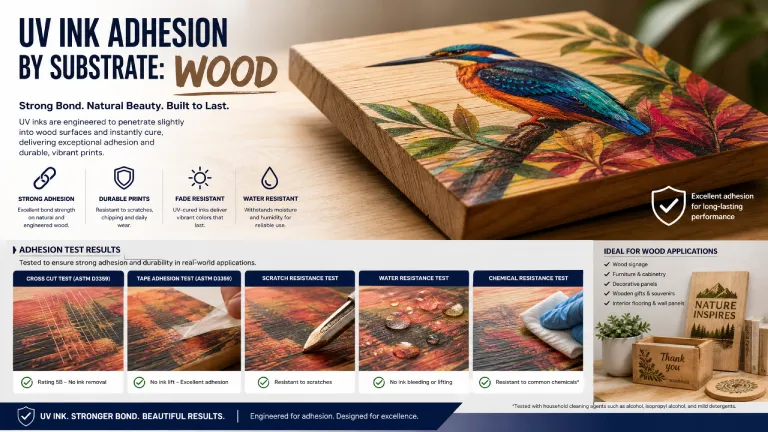
خشب
Wood is one of the more challenging substrates for UV printing because it is porous, can contain natural oils depending on the species, and often has factory sealants or finishes applied during manufacturing. Untreated raw wood absorbs UV ink rather than letting it cure on the surface, which leads to weak adhesion and dull color. Finished or sealed wood may have a coating that prevents ink from bonding.
- Sand sealed or coated wood before printing to remove the surface finish
- Clean with IPA after sanding to remove dust and residue
- Apply a UV primer coat for best adhesion on difficult wood species like teak or cedar, which have high natural oil content
- Test on offcuts of the same board before printing the final piece, since wood grain and oil content vary even within the same species
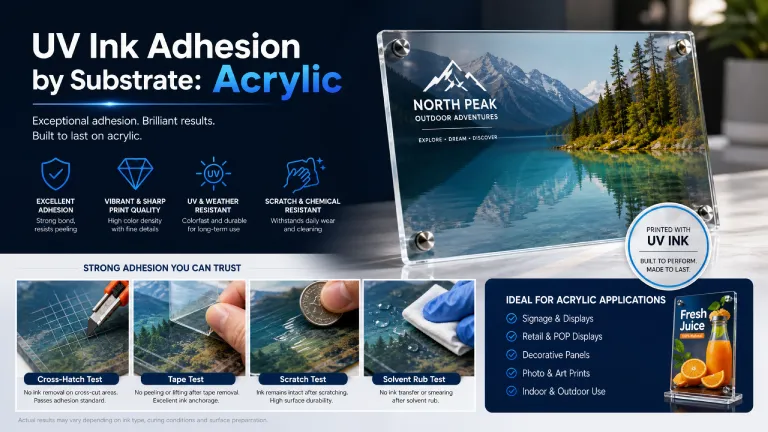
أكريليك
Acrylic is generally one of the easier materials for UV printing when properly prepared, since it provides a smooth, non-porous surface. The main issue is surface contamination, particularly the protective film that most acrylic sheets ship with. Always remove the protective film just before printing, and clean with acrylic-safe cleaner immediately after removal.
- Remove protective film immediately before printing, not hours in advance
- Use acrylic-safe cleaner rather than IPA, which can cause micro-crazing on some acrylic formulations
- Avoid touching the print surface after cleaning
- Cast acrylic typically accepts UV ink better than extruded acrylic — if adhesion is consistently poor, confirm which type of acrylic you are using
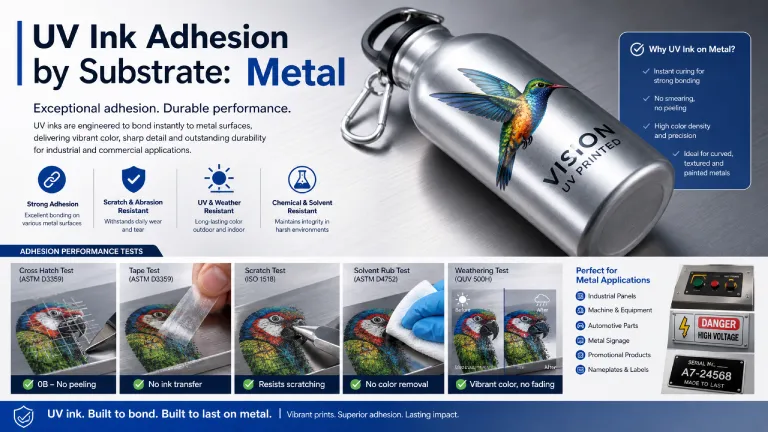
معدن
Metal surfaces vary significantly in their UV ink compatibility depending on finish, alloy, and any coatings applied during manufacturing. Brushed aluminum, powder-coated steel, and raw stainless steel all behave differently. Roland DGA’s substrate printing guidance recommends testing adhesion on any new metal substrate before production, since surface treatment variations between suppliers can significantly affect results even with the same nominal material.
- Clean with IPA and allow to dry fully before printing
- Apply adhesion promoter for smooth or anodized metal surfaces
- Powder-coated metal generally prints well without primer, but test first
- Avoid printing on metal that has been recently handled without gloves — fingerprint oils are extremely hard to remove completely without re-cleaning
Quick Diagnosis Checklist
Run through these questions to narrow down the cause quickly:
- Did you clean the surface with IPA or appropriate cleaner immediately before printing? If no → clean first
- Did you handle the substrate with bare hands after cleaning? If yes → clean again
- When were the UV lamps last replaced, and how many hours are on them? If over 800 hours → test lamp output
- Is the ink peeling in sheets (primer issue) or scratching off in powder (under-cure issue)?
- Is the failure happening on all substrates or only one specific material? If only one → compatibility or contamination issue
- What is the room temperature and humidity? If outside 18-25°C and 40-60% humidity → adjust environment
- Is the print head height set correctly for the substrate thickness? If uncertain → re-measure and adjust
When to Contact Your Printer Manufacturer
If you have worked through all of the above steps and UV ink adhesion problems persist, the issue may be with the printer hardware itself rather than the substrate, حبر, or environment. Print head damage, UV lamp fixture alignment problems, or firmware issues with the curing cycle can all cause adhesion failure that surface preparation and settings adjustments will not fix.
Xinflying provides technical support for all Xinflying طابعة للأشعة فوق البنفسجية نماذج. If you are experiencing consistent adhesion issues that do not resolve with the troubleshooting steps above, contact our support team for hardware diagnostics and assistance.
الأسئلة المتداولة
Why does my UV ink peel off after printing?
UV ink peeling off after printing is almost always caused by surface contamination, insufficient curing, or missing primer. Clean the substrate thoroughly with IPA immediately before printing, check your UV lamp output, and apply adhesion promoter if printing on glass or smooth metal.
Does UV ink stick to wood without primer?
UV ink can stick to wood without primer if the surface is clean and the wood has not been sealed or treated. لكن, high oil-content wood species like teak and cedar often need a UV primer for reliable adhesion. Sealed or finished wood should always be sanded before printing to remove the surface coating.
Why does UV ink not stick to acrylic?
The most common causes of UV ink not sticking to acrylic are surface contamination from the protective film, fingerprint oils, or using IPA that is not suitable for the specific acrylic formulation. Remove the protective film immediately before printing, clean with acrylic-safe cleaner, and avoid touching the surface after cleaning.
How do I know if my UV ink is under-cured?
Under-cured UV ink typically scratches off easily with a fingernail or feels slightly tacky to the touch. Properly cured UV ink should be fully hard and scratch-resistant. If your prints scratch easily, slow down the print speed, check your UV lamp hours, and clean the lamp housing to ensure full light output.
Can UV ink be printed on metal without any preparation?
In most cases, no. Metal surfaces need at minimum a thorough IPA wipe-down before printing. سلس, anodized, or polished metal surfaces typically also need an adhesion promoter or primer to achieve reliable adhesion. Powder-coated metal generally prints better without primer but should still be cleaned before printing.
How often should UV lamps be replaced?
Most UV printer lamps should be replaced every 500 ل 1,000 hours of use depending on the lamp type and manufacturer specification. Even when lamps still appear to be working, their UV output can drop significantly with age, leading to under-curing and adhesion problems. Check your printer’s hour counter and compare to the manufacturer’s recommended replacement interval.