DTF printer boshingizni tozalash bo'yicha yakuniy qo'llanmaga xush kelibsiz. Ushbu keng qamrovli maqolada, Biz toza bosib chiqarish boshini saqlash muhimligini bilib olamiz, Chaqirilgan bosib chiqarish boshi alomatlarini qanday aniqlash mumkin, Tozalash uchun turli xil usullar va vositalar, Muammolarni bartaraf etish bo'yicha maslahatlar, profilaktika choralari, va qachon almashtirishni ko'rib chiqish kerak. Ushbu qo'llanma oxirida, DTF printer boshini yuqori darajadagi bosib chiqarish sifati uchun eng maqbul holatda saqlash uchun barcha zarur bilimlarga ega bo'lasiz.
Chop etish boshi nima?
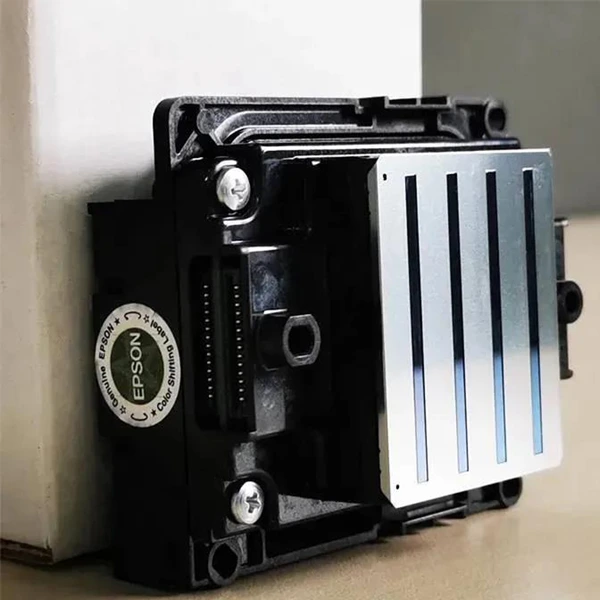
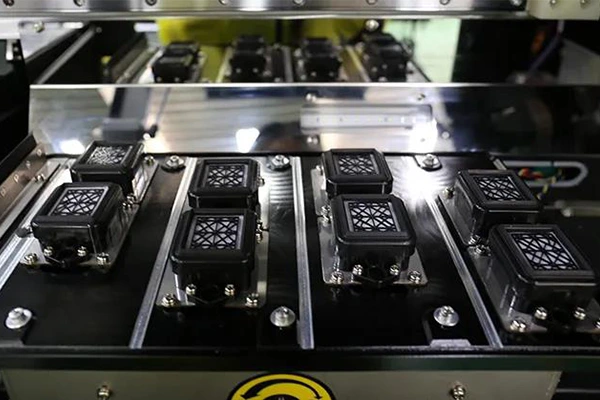
DTF printer boshini tozalashning o'ziga xos xususiyatlariga o'tishdan oldin, Tasdiqlash boshi nima ekanligini tushunish juda muhimdir. A bosib chiqarish boshi - bu chop etish uchun mas'ul bo'lgan printerning tarkibiy qismi, mato yoki qog'oz kabi. Unda ichak tomchilari rasmlarni yoki matnni shakllantirish uchun siyohni chiqaradigan mayda nozullar mavjud. Toza bosma boshning maqbul bosma sifatini saqlash va bosilgan mahsulotda chiziqlar yoki chiziqlar kabi muammolarni oldini olish uchun zarurdir.
Nega printer boshini tozalash kerak?
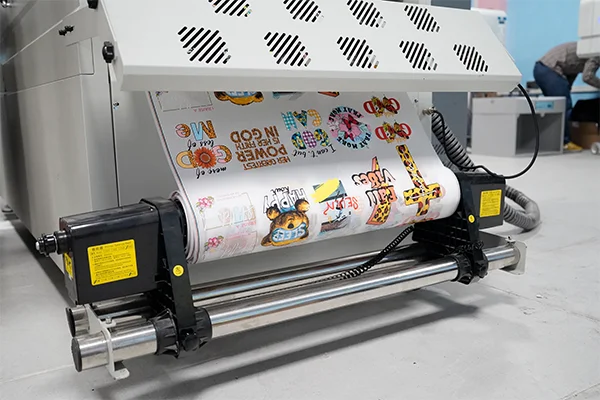
Tiqilib qolgan bosma boshingiz sizning bosmalaringizning sifatiga sezilarli darajada ta'sir qilishi mumkin. Chop etish boshidagi nozullar bloklangan yoki qisman bloklanganda, siyoh oqimi buziladi. Bunga olib kelishi mumkin siyohning notekis taqsimlanishi, olib boradigan xira ranglar, chizma, yoki bosma nashrlarda chiziqlar. Bosma boshingizni toza saqlash orqali, siyoh silliq oqayotganini ta'minlaysiz, keskin va jonli bosmalarni kafolatlash.
Tiqilib qolgan chop etishning belgilari
manba: pinterest
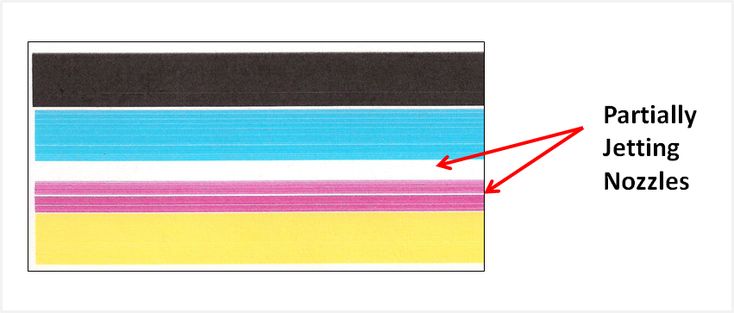
Chop etish yoki bosib chiqarish boshingizni tozalash yoki almashtirish kerakligini aniqlash, Chop etilgan bosma boshning belgilaridan xabardor bo'lish juda muhimdir. Ushbu belgilarga e'tibor bermaslik yanada zarar etkazishi va printeringizning umumiy ishlashiga ta'sir qilishi mumkin.
Tiqilib qolgan bosma boshning umumiy belgilari o'z ichiga oladi:
- Notekis yoki tazyiqlar: Agar siz u erda bo'lmasligi kerak bo'lmagan chiziqlar yoki chiziqlar haqida ogohlantirsangiz, Bu tiqilib qolgan chop etish boshining ko'rsatmasi bo'lishi mumkin. Blokirovka siyoh oqishini buzadi, natijada ziddiyatli chop etish.
- Xiralashtirilgan bosma: Xabarlar tiqilib qolganda, siyoh to'g'ri tarqalib ketmasligi mumkin, Chop etilganlar xiralashgan yoki yuvilgan. Bu, ayniqsa, rang zichligi yuqori bo'lgan joylarda sezilarli bo'lishi mumkin.
Printer boshlarini tozalash uchun nimadan foydalanishim mumkin
manba: pinterest
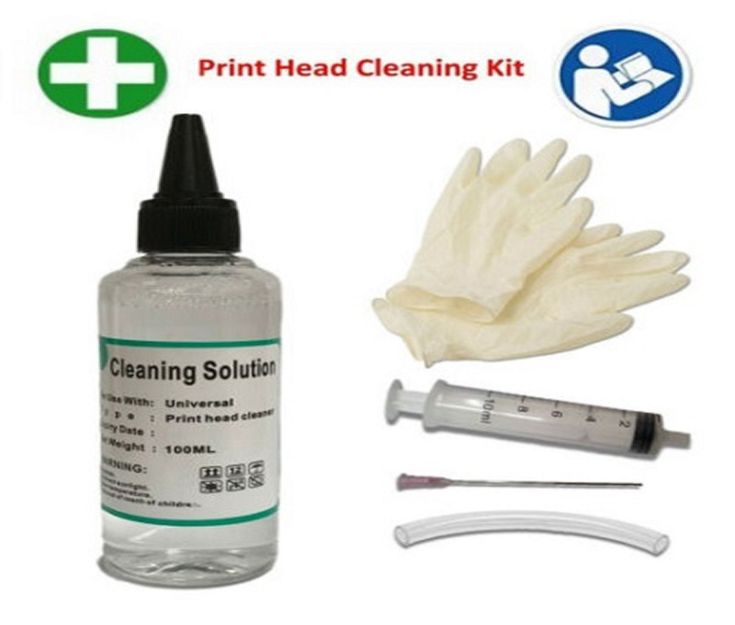
Printer boshlarini samarali tozalash uchun, Tegishli vositalar va tozalash eritmasini tanlash juda muhimdir. Ushbu bo'lim sizni tozalash jarayoni uchun zarur bo'lgan vositalar va eng yaxshi tozalash uchun tavsiyalar berish uchun qisqacha ma'lumotni taqdim etadi.
Bosib chiqarish boshini tozalash uchun zarur bo'lgan vositalar
- Yumshoq, lintsiz mato: Bosma boshning nozik qismlarini siqib chiqarmaydigan yoki shikast etkazmaydigan yumshoq matodan foydalanish juda muhimdir. Bir lahzani bo'shatadigan mato ichki siyoh va qoldiqlarni artib olish uchun ideal yuzani beradi.
- To'qishlar yoki paxta qatlamlarini tozalash: Bu kichik, changlash vositalari bosma qadoqlashning asosiy joylarini tozalash uchun foydalidir. Ular sizga aniq nozullarni nishonga olishga va o'jar tiqilib qolish yoki qurishga imkon beradi.
- Shprits: Springs Exchangni bosib chiqarish boshiga tozalash yoki nozullarni o'chirish uchun qadrli bo'lishi mumkin. Ular aniq nazoratni taklif qilishadi va har qanday tuzoqqa tushgan siyoh yoki qoldiqlarni ajratib olishga yordam beradi.
Printer boshi uchun tavsiya etilgan tozalash eritmasi
- Boshni tozalash eritmasi: Ushbu echimlar quritilgan siyohni eritib yuborish uchun maxsus shakllangan va bosma qadoq ostidagi bloklarni tozalash. Ular yumshoq bo'lish uchun mo'ljallangan, bosma boshning yaxlitligini buzmasdan puxta tozalashni ta'minlash.
- Izopropil spirti: Kontopropil spirti konsentratsiya bilan 90% yoki undan yuqori tozalash eritmasi sifatida ham foydalanish mumkin. U a'lo to'lovsiz xususiyatlarga ega va bosma qadoqda siyoh qoldiqlarini samarali buzishi mumkin. Biroq, izopropil spirtli ichimliklarni kamdan-kam hollarda va ehtiyotkorlik bilan ishlatish juda muhimdir, haddan tashqari foydalanish yoki uzoq vaqt davomida ta'sir qilish bosma boshiga zarar etkazishi mumkin.
Tozalash eritmasini tanlaganda, Buning uchun amal qilish juda muhimdir DTF printer ishlab chiqaruvchisiTavsiyalar va ko'rsatmalar. Bosib chiqarish boshini buzadigan yoki yomonlashishi mumkin bo'lgan qattiq kimyoviy moddalar yoki eritgichlardan saqlaning.
4 Print boshini tozalash usullari
Chop etish boshini tozalash turli usullar va echimlar yordamida amalga oshirilishi mumkin. Bu yerga, Biz to'rtta samarali tozalash usullarini o'rganamiz:
Usul 1: Tozalash eritmasi va matodan foydalanish
Ushbu usul bosma boshni va bosma boshni muloyimlik bilan tozalash uchun bosib chiqarish boshlari va yumshoq mato bilan tozalash eritmasini ishlatishni o'z ichiga oladi.
Chop etish boshlig'ini tozalash uchun tozalash eritmasini ishlatish bo'yicha bosqichma-bosqich ko'rsatmalar:
- Printerning qo'llanmasini bosib chop etish boshini yig'ishni aniqlash va agar kerak bo'lsa, uni olib tashlash uchun printerning qo'llanmangizga murojaat qiling.
- Yumshoq joyga tozalash eritmasini tozalash eritmasini qo'llang, lintsiz mato.
- Tasdiqlash boshini supurish harakatiga sekin artib oling, Barcha sohalarni qamrab olishingizni ta'minlash.
- Haddan tashqari bosimni qo'llashdan saqlaning, bosma boshiga zarar etkazishi mumkin.
- Agar kerak bo'lsa, mato endi siyoh qoldiqlarini yig'maguncha takrorlang.
- Qayta tiklanishdan oldin chop etish boshini to'liq quriting.
Samarali tozalash uchun maslahatlar va fokuslar:
- Ushbu tozalash jarayonini chang yoki ifloslantiruvchi samolyotni bosib chiqarish boshlig'ida joylashmaslik uchun tozalash va ifloslangan joyga olib boring.
- Tozalash jarayonini muntazam bosib chiqarish sifatini saqlash uchun muntazam ravishda takrorlang.
- Agar tozalash jarayonida mato siyoh bilan to'yingan bo'lsa, Uni bosib chiqarish boshiga siyohni qaytarib olish uchun yangi bir narsa bilan almashtiring.
Usul 2: Tozalash to'plamidan foydalanish
Chop etish uchun maxsus ishlab chiqilgan to'plamlarni tozalash bozorda tezda mavjud. Ushbu to'plamlarda odatda tozalash echimlarini o'z ichiga oladi, shprits, va puxta tozalash uchun zarur bo'lgan boshqa vositalar.
Bozorda mavjud bo'lgan tozalash to'plamlari haqida umumiy nuqtai:
Tozalash to'plamlari ko'pincha tozalash jarayoni orqali sizni boshqarish uchun bosqichma-bosqich ko'rsatmalar bilan birga keladi. Ular tozalanish eritmasi bilan nozullarni yuvish uchun shprits kabi qo'shimcha vositalarni o'z ichiga olishi mumkin.
Tozalash to'plamidan boshqa hech qanday toza va bosib chiqarish boshini tozalashga qanday foydalanish kerak:
- Tozalash to'plamida mavjud bo'lgan asboblar va tozalash eritmalaridan foydalanish bo'yicha aniq qadamlar uchun berilgan ko'rsatmalar bilan maslahatlashing
- Tasdiqlangan boshni yechish va siyoh qoldiqlarini olib tashlash uchun tavsiya etilgan protseduralarga amal qiling.
- Shpritsni bosib chiqarish uchun tasodifiy shikastlanishni oldini olish uchun ehtiyot bo'ling.
Usul 3: Distillangan suv bilan qo'lda tozalash
Tozalash echimlariga alternativa uchun, Distillangan suv bilan qo'lda tozalash printer boshlig'ini kamdan-kam hollashtirish mumkin.
Distillangan suvdan foydalanib, qo'lda tozalash bo'yicha bosqichma-bosqich ko'rsatmalar:
- Avvalgidek, Agar kerak bo'lsa, bosib chiqarish boshini topish va olib tashlash uchun printerning qo'llanmaingizni oling.
- Distillangan suv bilan idishni to'ldiring.
- Distillangan suvda bosib chiqarish boshini ehtiyotkorlik bilan cho'ktiring, faqat ta'sirlangan hududni susaytirishini ta'minlash.
- Har qanday quritilgan siyoh yoki qoldiqlarni ajratib olish uchun bosib chiqaring.
- Bir necha daqiqadan so'ng, Chop etish boshini suvdan olib tashlang va uni butunlay quriting.
- Chop etish boshini qayta o'rnating va ko'k rang hal qilinganligini tekshiring..
Distillangan suvdan foydalanishda ehtiyot choralari:
- Faqat distillangan suvdan foydalaning, Tap suv tarkibida bosib chiqarish boshiga zarar etkazadigan minerallar bo'lishi mumkin.
- Chop etish boshini uzoq vaqt davomida namoyon qilmang, Suvning uzoq vaqt ta'siri ichki zarar etkazishi mumkin.
Usul 4: Istopropil spirti yordamida
Izopropil spirtli ichimliklar chop etish uchun yana bir samarali tozalash vositadir, Ayniqsa, o'jar siyoh qoldiqlarini olib tashlash uchun.
Chop etish boshini tozalash uchun izopropil spirti qanday ishlatilishi mumkin:
- Agar kerak bo'lsa, printerning qo'llanmaingizni ko'rsating va bosib chiqarish boshini olib tashlang.
- Izopropil spirti bilan yumshoq mato yoki paxta almashtirish.
- Chop etish boshini muloyimlik bilan artib oling, Siz barcha nozullarni va sirtlarni qamrab olishingizni ta'minlash.
- Haddan tashqari bosimni qo'llamang.
- Tasdiqlash boshini qayta o'rnatishdan oldin bosib chiqaring.
Spirtli ichimliklarni tozalash uchun ishlatiladigan muhim fikrlar:
- Kontopropil spirti konsentratsiya bilan ishlating 90% yoki puxta tozalash uchun undan yuqori.
- Spirtli ichimliklarni yoki boshqa spirtli ichimliklarni o'z ichiga olgan boshqa spirtli mahsulotlarni ishqalashdan saqlaning, Bular chop etishga zararli bo'lishi mumkin.
Muammolarni bartaraf etish bo'yicha maslahatlar
Tozalashdan keyin ham, Chop etish boshi tiqilib qolganda holatlar bo'lishi mumkin. Bunday hollarda, masalani hal qilish va tegishli choralarni ko'rish juda muhimdir.
Tozalashdan keyin bosilgan boshingiz tiqilib qolgan bo'lsa nima qilish kerak:
Har qanday nozullar hali ham bloklanganligini aniqlash uchun printer nozsini tekshiring.
- Agar ba'zi nozullar tiqilib qolsa, Ushbu sohalarga xos bo'lgan tozalash jarayonini takrorlang.
- Agar muammo davom etsa, Printerning qo'llanmasiga murojaat qiling yoki qo'shimcha yordam uchun ishlab chiqaruvchining mijozlarni qo'llab-quvvatlashiga murojaat qiling.
Kasbiy yordamni talab qiladigan potentsial printer masalalarini aniqlash:
Ba'zi hollarda, Chaqirilgan bosma boshi printer ichida yanada muhim muammo bo'lishi mumkin. Agar siz barcha tozalash usullari va muammolarni bartaraf etish bo'yicha maslahatlarni muvaffaqiyatsiz bajargan bo'lsangiz, Kasbiy yordam so'rash kerak bo'lishi mumkin. Professional texnik xodimlar qayta tashxislash va takrorlanadigan to'siqlarni keltirib chiqaradigan barcha asosiy muammolarni tuzatishlari mumkin.
Toza chiziqli boshni saqlash
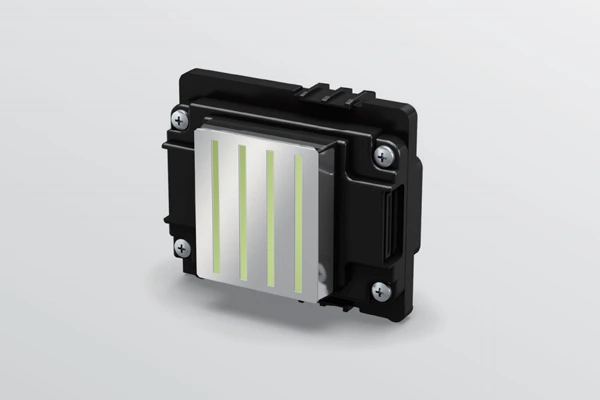
Kelgusida tiqilib qolishning oldini olish va toza chop etishning boshini saqlash uchun profilaktik chora-tadbirlar zarurdir.
Kelgusida tiqilib qolish muammolarini oldini olish uchun profilaktika choralari:
- Ushbu qo'llanmada ilgari muhokama qilingan tegishli tozalash usullaridan foydalanib, printer boshini muntazam tozalang.
- Uzoq vaqt davomida printer bo'shlig'ini tark etishdan saqlaning, Bu siyoh qurishi va tiqilib qolishiga olib kelishi mumkin.
- Vaqti-vaqti bilan blokirovka qilish va ularga bosma saodat sifatiga ta'sir qilish uchun vaqtni tekshirish.
Muntazam texnik xizmat ko'rsatish uchun eng yaxshi amaliyotlar:
- Printerni toza va changsiz muhitda saqlang.
- Noqonuniy yoki quritishning oldini olish uchun siyohli patronlarni to'g'ri saqlang, tiqilib qolishga olib kelishi mumkin.
- Printerni saqlash uchun raqamli to'qimachilik printer ishlab chiqaruvchisi ko'rsatmalariga amal qiling, Tavsiya etilgan tozalash oralig'i va protseduralar.
O'zgartirishni qachon ko'rib chiqish kerak
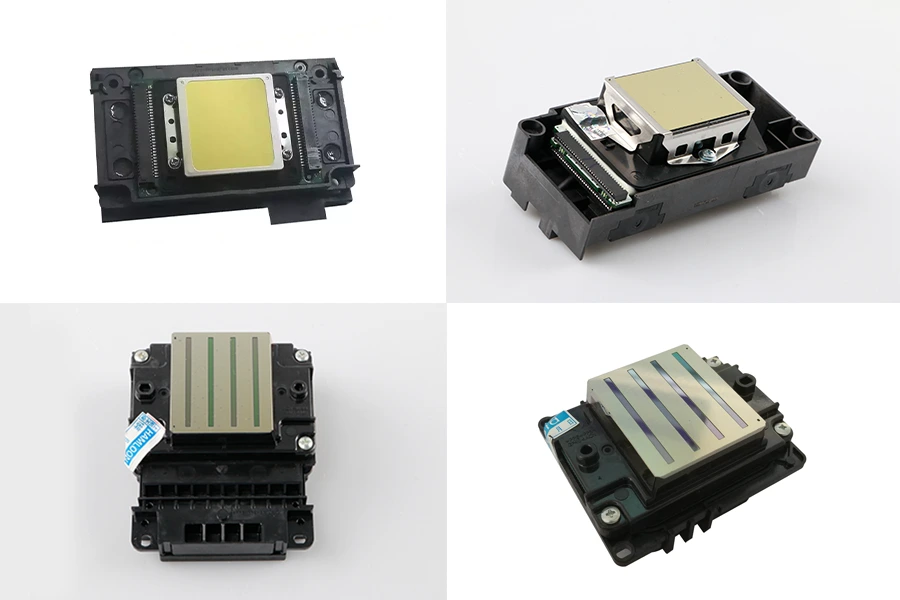
Muntazam tozalash va texnik xizmat ko'rsatish bosqichi boshlig'ingiz hayotini sezilarli darajada kengaytiradi, almashtirish zarur bo'lganda vaqt kelishi mumkin. Xo'sh, menga yangi pritale-rasm kerakligini qaerdan bilaman?
Sizning bosib chiqarish boshingizni almashtirish kerak bo'lgan belgilar:
- Doimiy tiqilib qolish: Agar sizning bosma boshingiz tez-tez tiqilib qolishni davom ettirsa, Oddiy tozalashiga qaramay, Bu qaytarib bo'lmaydigan zararning belgisi bo'lishi mumkin.
- Nomuvofiq chop etish sifati: Agar siz puxta tozalashdan keyin ham qattiq bosma sifatli muammolarni sezsangiz, Bu bosish boshi foydalanadigan umrining oxiriga yetganligini ko'rsatishi mumkin.
Bosib chiqarish boshini almashtirishdan oldin e'tiborga olish uchun omillar:
- Narxi: Bosma va uzoq umr ko'rishdagi potentsial foydasiga almashtirish narxini baholang.
- Printer modeli: Tasdiqlash boshi sizning maxsus printer modelingiz uchun tayyorligini tekshiring.
- Kafolat: Agar printeringiz hali ham kafolatda bo'lsa, O'zgartirish bo'yicha ko'rsatmalar uchun ishlab chiqaruvchini bog'lang.
Xulosa
Ushbu keng qamrovli qo'llanmada, Biz "Optimal bosib chiqarish sifati uchun" DTF "printer boshini saqlash muhimligini o'rgandik. Tozalash uchun turli xil usul va vositalar va vositalar bilan muhokama qildik, Muammolarni bartaraf etish bo'yicha maslahatlar, profilaktika choralari, va qachon almashtirishni ko'rib chiqish kerak. Ushbu maqolada belgilangan tavsiyalar va eng yaxshi amaliyotlar, Siz DTF printer boshingizni asosiy holatda saqlab qolishingizni ta'minlashingiz mumkin, Sizni ajoyib bosma nashrlarga erishishga imkon berish. Eslab qoling, Toza bosma bosh - bu juda ajoyib bosib chiqarish natijalari.


